Persian Lime and Sage Sorbet

19 Mar

20130320-010240.jpgMy wife and I attend a monthly meeting with other couples. During this past meeting, one of the couple had brought up how one of their relatives made a dessert out of basil. That inspired me to think of the classic lemon/basil combination. However, these days, that combination is so overused, that it has become rather boring to me. It is like the molten chocolate cake…you see it everywhere. So I thought, how can I create something similar? Then it came to me one night at the grocery store – limes and sage.20130319-161115.jpgI used Persian Limes for this sorbet. They remind me of key limes, but without that bitter pucker. Persian Limes are aromatically spicy and fragrant. I like the combination of the slightly peppery, flavorful profile of sage – it’s medicinal properties only make it more interesting.

20130319-161243.jpg20130319-161959.jpgI started by juicing two pounds of fresh Persian Limes, that I then passed through a fine mesh sieve, to rid the pulp. Meanwhile, I boiled water and sugar to make the simple syrup. After a minute of boiling, I removed the simple syrup from the heat, and allowed the fresh Sage leaves steep and infuse in the hot syrup for 30 minutes.

20130319-161402.jpgThe syrup was then cooled in the freezer for one hour. Once cooled, I mixed in the Persian Lime juice along with two ounces of Cointreau. The Cointreau tones down the intensity of the sage, and compliments the Persian Limes ever so lovely.20130320-010251.jpg

Persian Lime and Sage Sorbet

Ingredients:

12 oz Persian Lime juice, passed through a fine mesh sieve, about 2 lbs of fruit

2 cups sugar

3 cups water

1/2 oz fresh sage, with stems

2 oz Cointreau

Directions:

1. Wash the limes well and lightly roll and press the limes against your counter surface with the palm of your hand to loosen the juice.

2. Cut the limes in half. Using gloves to protect your hands, juice the limes with a manual citrus juicer, an electric citrus juicer or by simply squeezing the juice out by hand.

3. Meanwhile, bring the water and sugar to a boil for one minute. Remove from heat, and add the sage. Allow the sage to steep for 30 minutes.

4. Remove the sage, and discard. Place the syrup in the freezer for one hour. Place the pulp-free lime juice in the refrigerator.

5. Once cooled, add the lime juice and Cointreau to the syrup.

6. Freeze in an ice cream maker, according to the manufacturers instructions.

Palmiers

26 Oct

The Puff pastry we made a few weeks ago is truly a versatile dough. The delectable, buttery, lightly sweet cookie we can make with the sinfully delicious pastry dough is heaven. Palmiers, also known as Elephant Ears or Orejones (in spanish), are so simple and easy yet amazingly delicious.

The ingredient list is short: puff pastry, and vanilla sugar. The puff pastry is rolled out with the vanilla sugar instead of flour. It is then given a double book fold (like the one we used to make the puff pastry), and re-rolled again with the vanilla sugar. It is then folded in a fashion to create the signature shape of a Palmier cookie.

The combination of butter, caramelized sugar and warm vanilla creates a flavor that is so harmonious and delicate. The layers of the puff pastry also receive the caramelized treatment and are crispy and soft altogether.

Palmiers
Yields: 32 cookies

Ingredients:

1 recipe Puff Pastry
3 cups Vanilla Sugar (Scroll to bottom)

Directions:

  1. If you froze the puff pastry, allow it to defrost for 24 hours in the refrigerator before using.
  2. Preheat oven to 425°F.
  3. Sprinkle 1/4 cup of the vanilla sugar on the surface, and place the puff pastry on top.
  4. Sprinkle the top part of the puff pastry with 1/4 cup of the vanilla sugar.
  5. Roll the dough out making 1/4 turns after each roll, making sure to keep on adding the sugar in between turns, until you have used half of it (1 1/2 cups). The final measurement of the rolled out dough should be 20″ X 15″.
  6. Do a double book fold; like the one done for the puff pastry.
  7. Cover the dough in plastic wrap and refrigerate for 15 minutes.
  8. Repeat steps 2 to 4.
  9. Roll the dough out until it is 25″ X 17″.
  10. To fold the dough, grab one lengthwise side of it, and fold it towards the center. Repeat for the other lengthwise side.
  11. Fold the folded lengthwise side towards the center, creating a slimmer lengthwise side, repeat for the other side.
  12. Fold the edges over themselves. To understand the folding part easier, look at the images in the post as your guide.
  13. Cut out the cookies with a knife pressing down, do not saw.
  14. The cookies can then be baked or frozen for up to 3 months.
  15. To freeze, place the raw cut cookies on a parchment lined sheet pan, making sure they are not touching each other. Place the sheet pan in the freezer for 2 hours. Transfer the frozen raw cookies to a freezer bag. To bake, take the desired amount out of the freezer bag and place on a parchment lined sheet pan, making sure they are not touching each other. Allow them to defrost for 1 hour before baking.
  16. Place on a parchment lined sheet pan and bake for 7 minutes, then with a spatula flip the cookies over, and bake for an additional 3 minutes or until the cookies are golden brown.

Individual Fig and Cardamom Tartlet

22 Oct

A few weeks ago we made a delicious jam out of Figs to celebrate the bounty of Autumn. Today, we will combine the jam we made with pistachio and cardamom.

I love to make tarts or tartlets in Autumn. They are like pies, but the fruit is either fresh, or in a jam. The garnish to a tart is always more celebratory of the fruit that has gone into the making of it. Figs are such a versatile fruit, and go so well with pistachio. The pistachio shortbread we make for this tart is buttery, tender, and tastes like the nut. Unlike many shortbread doughs, this particular shortbread is made with cooked egg yolks instead of raw. The logic behind that madness is rather simple: we want the richness that the egg yolks add to a shortbread, but we do not want the moisture.

I cooked my egg yolks by hard boiling. I used what many refer to as the “Julia Child” method. Where the eggs are placed in the pot with cold water. The water is then allowed to come to a full boil, then the pot is removed from the heat source, covered and allowed to sit. This slowly cooks the eggs, and the egg yolks do not obtain that nasty grey color. Instead, they remain a bright appetizing yellow.

For the pistachio, I used shelled unsalted pistachios. They were crushed, and added to the dough just before all the ingredients were combined well. It is important to crush them well, other wise you will end up with a crust that is too thick.

I love cardamom, I like to use it in my sweet potato, and pumpkin pies. I specially use it when I make speculoos spice for speculoos cookies and Kruidnootjes. The versatile spice goes well in tea and coffee too. I infused the pastry cream in cardamom, but a I allowed the ground spice to remain in the cream; it creates an illusion that is just so lovely.

After blind baking the crust, I piped enough jam to fill 2/3 of the tart, I then filled the remaining 1/3 with the pastry cream. I used a small off-set spatula to smooth out the top surface, and then I decorated the tartlet with fresh figs, supreme orange segments, a single pistachio nut, and some pistachio brittle which I had made.

Individual Fig and Cardamom Tartlett

Ingredients:

1 recipe Fig-Orange Jam
1 recipe Cardamom Pastry Cream (recipe follows)
1 recipe Pistachio Shortbread (recipe follows)
Fresh Black Mission or Kadota Figs for decor
15 Shelled unsalted pistachio nuts for decor
15 Supreme Orange Segments for decor
Pistachio Brittle for decor (recipe follows)

Directions:

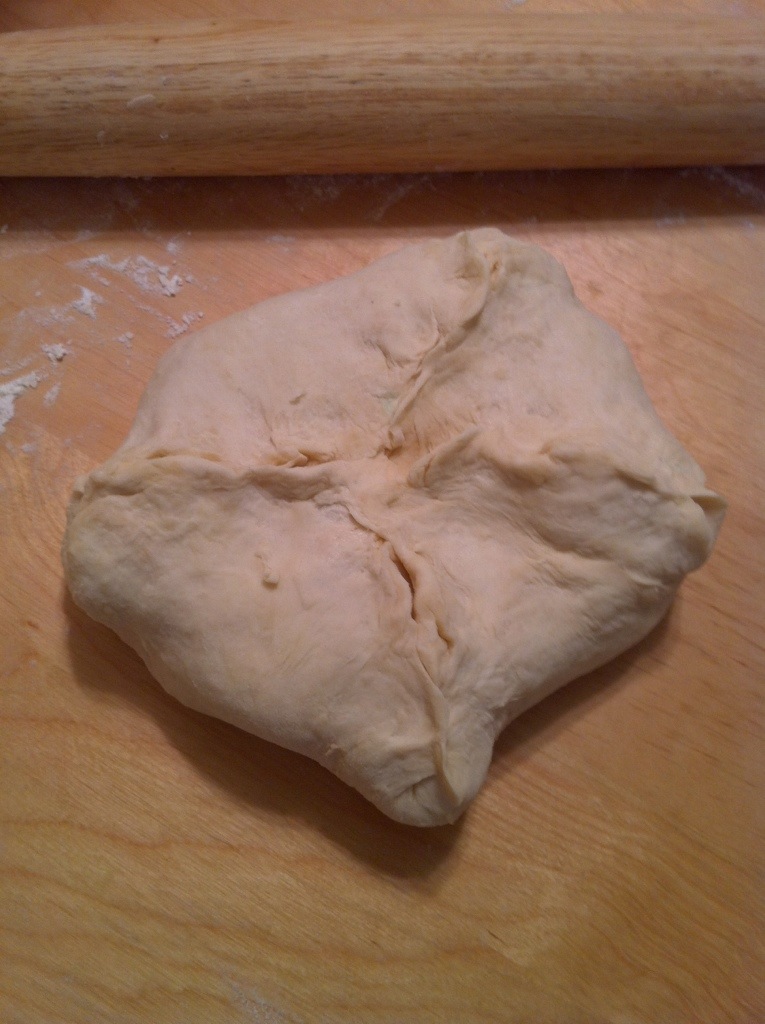
1. Roll out the shortbread to 1/4″ thickness.

2. Fit over the tartlet pan, and cut off the excess shortbread.

3. Using a fork, prick shortbread in the tartlet pan. Blind bake the shortbread at 350 F for 7 to 9 minutes.

4. Meanwhile, fill one pastry bag with the pastry cream, and another with the jam.

5. Once baked, allow the crust to cool down for 30 minutes.

6. Carefully, remove the baked shortbread crusts from the tartlet pans.

7. Fill the tartlet crust 2/3 of the way up with the jam.

8. Fill the remaining 1/3 of the crusts with the pastry cream.

9. Using a small offset spatula, even out the top surface.

10. Decorate the top of the tartlet with the fresh fig, the pistachio nut, pistachio brittle and the supreme orange segment in a contemporary fashion.

Cardamom Pastry Cream

Ingredients:

24 fluid ounces Milk
8 fluid ounces Heavy cream
7 1/2 ounces Granulated sugar
10 Egg yolks
2 1/4 ounces Cornstarch
1 1/2 teaspoon ground Cardamom
2 oz Butter, unsalted
1 teaspoon pure Vanilla Extract

Directions:

1. In a medium saucepan, combine the milk, heavy cream, half of the sugar, and cardamom.

2. In a small bowl, combine the egg yolks, the remaining half of the sugar and cornstarch.

3. Bring the mixture in the saucepan to a boil.

4. Pour 1/4 of the hot saucepan mixture into the small bowl to temper the eggs.

5. Pour the tempered egg mixture into the saucepan.

6. Bring the mixture to a boil, while continuously whisking it vigorously.

7. Once the mixture comes to a boil, remove from heat and immediately transfer to a bowl.

8. Allow the mixture to cool down to 100 F.

9. Add the butter, and vanilla extract.

10. Allow the pastry cream to cool down to room temperature before using.

Pistachio Shortbread

Ingredients:

12 oz Butter, unsalted & softened
5 1/2 oz Powdered Sugar
1 1/2 teaspoon Pure Vanilla Extract
3/4 teaspoon Salt
5 oz Pistachio Meal/Flour*
5 Egg Yolks, hard boiled that have been pushed through a fine mesh sieve
13 oz All-Purpose Flour

Directions:

1. In a stand mixer fitted with the paddle attachment, cream the butter and powdered sugar.

2. Add the vanilla extract and salt, combine well.

3. Add the all of the egg yolks at once and combine well.

4. Scrape down the sides of the bowl, and mix to combine well.

5. Add the flour, and mix until just combined.

6. Add the pistachio meal/flour and mix until just combined.

7. Transfer the shortbread dough to a sheet of plastic wrap, cover tightly and refrigerate for at least 2 hours or overnight.

*If you can not find the pistachio meal/flour, simply weigh out whole unsalted, shelled pistachios to the amount required. Place the pistachios in a food processor with the entire flour amount. Turn the food processor on for 30 seconds. This will pulverize the nuts and will be just like the commercial product. Just add this entire mixture at once instead. Do not add additional flour.

Pistachio Brittle

Ingredients:

1 oz butter
10 oz sugar
8 oz pistachio nuts

Directions:

1. In a cast iron or heavy pan, melt the butter over medium heat.

2. Add the sugar in an even layer on the pan; allow it to melt.

3. Add the pistachio nuts in an even layer.

4. Continue cooking until the sugar caramelizes. DO NOT STIR! However, you may move the pan to swirl the mixture.

5. Pour the hot mixture on a large sheet of parchment paper. Place another equally large sheet of parchment paper on top to cover the entire mixture.

6. Using a rolling pin, roll the mixture that is sandwiched between the two sheets of parchment paper until it no longer stretches out.

7. Allow the brittle to cool down for 15 minutes before handling.

Pâte Feuilletée Fine – Fine Puff Pastry

8 Oct

Butter, butter and more butter make this scrumptious pastry dough incredible irresistible and the thin layers of pastry just top it off. Let it not bother you that the puff pastry has a whole pound of butter! Moderation is key when it comes to indulging in life’s palatable mischiefs.
20120917-113938.jpg

20120917-113947.jpg
There are two general different kinds of puff pastry. There is good old regular puff pastry and then there is fine puff pastry. The difference is simple: the amount of nearly microscopic layers of dough and fat created. Simple puff pastry has at least 73 layers, while fine puff pastry has at least 730 layers. First, lets look at a formula:

L=(f+1)^t

L=layers
f=folds
t=turns

This formula will tell us how many layers exist in the puff pastry. We will return to this later.

20120917-113956.jpg

First, we need to create what is called a détrempe or water dough. It contains,as the name implies: flour, water, salt and in this case a small amount of butter. The ingredients have to be very cold here! I’d like to emphasize that the secret to making puff pastry, is to always maintain the ingredients, and dough cold. Right, so the butter is cubed and frozen before it is used. We mix all of the dry ingredients and butter on low speed with the paddle attachment, until we have pea size butter, just like the Graham Crackers.

20120917-114020.jpg
The dough is then wrapped and refrigerated at least 6 hours. Meanwhile, we make a block of butter. This butter will become the “fold-in” butter.

Six hours later, we roll the dough out, place the block of butter in the center, enclose it like an envelope, roll it out and do a double book fold. A double book fold has three folds. We do this five more times, allowing the covered dough to rest in the refrigerator for at least thirty minutes between each turn, for a total of six turns (as a rule of thumb, puff pastry always has at least 6 turns). Right, so back to the formula! We do a total of 3 turns per fold, for a total of 6 turns, lets take a look:

L=(f+1)^t

L=layers
f = folds = 3
t = turns = 6

L=(3+1)^6

L = 4,096

20121007-213302.jpg

20121007-220106.jpg

20121007-220117.jpg

So, this puff pastry has a total of 4,096 layers! So, it is right to assume that the fewer turns you make, the less layers you’ll have. If you’d like to have less layers, just have fewer turns.

20121007-220135.jpg

20121007-220144.jpg
I like to use puff pastry for a lot of different applications, it is truly versatile. It can be both sweet or savory. Try making breadsticks out of it, truly phenomenal! Works great as a pie or tart crust, and of course for Palmiers.

20121007-220344.jpg

20121007-220351.jpg

20121007-220358.jpg

20121007-220407.jpg
Fine Puff Pastry

Ingredients

13 oz Bread Flour
1 1/2 teaspoons Salt
3 oz Butter, Unsalted (mix-in)
7 oz Water
13 oz Butter, Unsalted (fold-in)

Directions

1. In the stand mixer’s mixing bowl, combine the flour and salt.

2. Small dice the mix-in butter, and place on top of the flour mixture.

3. Place the bowl in the freezer for 15 minutes.

4. Using the paddle attachment, mix the flour mixture on speed 1 until the butter is the size of peas, about 15 minutes.

5. Meanwhile, place the fold in butter in a large gallon size freezer bag. Seal the bag, ensuring all the air has escaped.

6. Using a rolling pin, roll out the butter to create one big block.

7. Using a serrated knife cut down the side seams of the freezer bag.

8. Using one of the now flaps, create a 4 in X 4 in block of butter, cover tightly and set in the refrigerator.

9. Once the butter in the flour is the size of peas, remove from the mixer, set paddle attachment aside, and mix in the water using a spatula, until the dough just comes together.

10. Tightly wrap the dough in plastic wrap, and store the refrigerator for six hours or over-night.

11. Roll the dough out to a 6 in X 6 in square.

12. Place the block of butter in the center.

13. Fold over all four corners of the squared dough onto the center of the butter block.

14. Making sure all air is out, tuck in the corners of the dough.

15. Pinch the touching sides of the dough together to create a seam.

16. Turn the dough over, and create two ridges with the rolling pin along the top of the dough.

17. Using the ridges as your guide, start rolling out the dough to a 20 in X 15 in rectangle.

18. Perform a double-book fold.*

19. Cover the dough well in plastic wrap, and allow the dough to refrigerate for thirty minutes.

20. Repeat steps 17 to 19 five more times, just omit the creation of the ridges.

21. Once done, allow the dough to refrigerate for thirty more minutes before using, or cover well in plastic wrap and aluminum foil and freeze for up to three months.

Double-Book Fold:

Fold “A” onto “B” and “D” onto “C”. Now fold “AB” onto “CD”.

20121007-220033.jpg

20121007-220043.jpg

20121007-220050.jpg

Fig-Orange Jam

26 Sep

20120923-142848.jpg

A few days ago we made a delicious Autumn bread. Today, we will make an Autumn jam that will go great with the bread, and that will go great with many different things.

20120923-142732.jpg

Figs are a delicately sweet, very mild and ever so delicate. It is very popular in the Middle East as a filling, a preserved fruit, or fresh. The large shrub produces the fruit in early to late Spring and again late Summer through Autumn. The taste of the flesh varies by variety, but they all tend to have a delicately sweet, fruity taste to them.

20120923-142725.jpg
For the jam I used two varieties: Black Mission and Kadota. The former is light sweet and earthy. It has a meaty texture, and is great as a snack, filing or to be used in jams. Kadota figs are sweet and fruity, their flesh is light, not as meaty as the Black Mission. The jam is also made with Oranges, Navel Oranges in this case. I used both the flesh and juice. For the flesh, I used the supreme segments. A supreme is a type of preparation that is done for citrus fruits. The top and bottom ends of the orange are cut off. The peel is then cut off along the side using a knife, while simultaneously removing the pith (the white fleshy stuff between the peel and fruit). The segments of the fruit are then cut off, using a knife, the segments are cut just inside the membrane that separates each segment. When done correctly, you are left with the fruit segments and no membrane at all.

20120923-142738.jpg

20120923-142745.jpg

20120923-142752.jpg

20120923-142759.jpg

20120923-142806.jpg

20120923-142813.jpg

20120923-142839.jpg
I also used the juice off of one orange and I added some orange oil. Orange oil can be found online, or can be made at home. If you opt out to make it yourself, as I have, you will first need a Steam Distiller. Make sure to use Organic orange peeks only. The orange oil is optional, but it dies add depth to the jam. To sweeten the jam, I used both Orange Blossom Honey and sugar.

This jam is perfect for your morning toast, try it on a pork loin. It also goes great with the Parmigiano-Reggiano and Black Pepper bread that we made earlier this week.

20120923-142854.jpg

20120923-142900.jpg

20120923-142908.jpg

Fig-Orange Jam

Ingredients

1 lb Black Mission Figs, fresh
1 lb Kadota Figs, fresh
2 large Navel Orange Supremes
2 oz Orange Juice, fresh
1 oz Lemon Juice, fresh
1/4 cup Orange Flower Honey
6 tablespoons Sugar
2 tablespoons Sugar, for the Pectin
1 tablespoon Pectin*
3 drops Orange Oil (Optional)

Directions

1. In a large bowl mash the figs and supremes well. In a small bowl, combine the Pectin and sugar for the pectin well; set aside.
2. Transfer to a medium sauce pan a d add the orange juice, lemon juice, honey, first sugar, and orange oil.
3. Bring to a boil over medium heat stirring occasionally.
4. Add the pectin mixture.
5. Stir vigorously for 2 minutes.
6. Transfer to a container of your choice, allow to cool down, and refrigerate in a well covered container. The jam will keep for 2 months.

*I recommend you follow the pectin directions that come with the box. I used the brand Pomona’s Universal Pectin, which gels with the addition of calcium, instead of sugar. This allows me to use less sugar.*

Parmigiano-Reggiano and Black Pepper Bread

24 Sep

20120918-161648.jpg

With Autumn arriving this past weekend, I started craving the bounty of what reminds me of Autumn. From earthy flavors to the delicate sweet flesh of an apple or pear, what is not to like? With that in mind, I decided to start this magical time of the year with a bread.

20120918-161544.jpg

20120918-161526.jpg
We start out with a poolish, which is a pre-fermented dough that is famous for giving Baguettes their signature taste. We apply it in this bread for both texture and taste. The yeasty, slightly sour taste will tone down the saltiness of the Parmigiano-Reggiano cheese, while pronouncing its earthy notes.

20120918-161555.jpg
The Parmigiano-Reggiano has to be authentic. Do not settle for Kraft. Go to a Whole Foods or a store that offers fine cheeses. The complexity of true Parmigiano-Reggiano is astronomical. True Parmigiano-Reggiano comes from multiple regions in Italy. It starts out with raw cows milk from cows that are only grass or hay fed. The raw milk is mixed with naturally separated skim milk. Calf rennet, an enzyme that separates the curds from the whey, is added. Once the separation occurs, the curds are broken into rice size pieces. The curds are passed though a muslin, and then placed in round molds. The molded cheese is then put into stainless steel rounds that are spring loaded to provide pressure to weigh down the curds. After a couple of days, the spring load is released, and the outer rind is imprinted with Parmigiano-Reggiano, the plant’s number, and the month and year of production. After a day, the cheese is put into a brine for 24 days. After 24 days, the cheese is removed from the brine, and placed in aging rooms for 12 months. After 12 months, a person dedicated to test the cheese, taps the cheese and listens to the sound it makes when lightly tapped with a hammer, and decides if it passes. It is then packaged, shipped and off to the consumer.

20120918-161603.jpg

20120918-161614.jpg
Pepper, black pepper in particular, gives the earthy cheese a nice contrast. The piquant berry balances the earthy notes. It gives it a very special dimension that takes the cheese to a whole new level. Freshly cracked pepper works best here. Don’t be afraid to grind it to a coarse size, in fact, I encourage it.

20120918-161621.jpg

20120918-161631.jpg
This bread takes two days to complete. The Poolish is made the day before and allowed to ferment for 6 hours at room temperature and is then refrigerated for 18 more hours. Once the final dough is formed it is allowed to ferment for one hour, it is then shaped, allowed to proof for 20 minutes, and then it is baked off.

20120918-161640.jpg

20120918-161704.jpg

20120918-161710.jpg
I love it when some of the Parmigiano-Reggiano oozes out during baking and crisps up! It is incredibly divine.

This bread is a great way to start out the beginning of Autumn. With its lightly sour crumb, to it’s earthy cheese and the pleasant berry that is pepper, it just begs to be brought to life!

20120918-161719.jpg

Parmigiano-Reggiano and Black Pepper Bread

Ingredients

1 recipe Poolish
14 oz Bread Flour
1 tablespoon instant yeast
9 oz water
3/4 teaspoon salt
1 1/2 tablespoons freshly coarsely cracked Black Pepper
6 oz Parmigiano-Reggiano cheese, diced small

Ingredients for the Poolish

10 oz Bread Flour
10 oz Water
1.5 teaspoons Instant Yeast

Directions for Poolish

1. In a medium bowl, combine all of the ingredients well.
2. Loosely cover and allow to sit at room temperature for six hours.
3. Transfer the covered bowl to the refrigerator and allow to ferment for eighteen more hours.
4. Allow the Poolish to warm to room temperature for twi hours before using.

Directions

1. In a mixer fitted with a paddle attachment, combine all of the ingredients, except the cheese.
2. Mix on speed three for six minutes, the dough will be very sticky and soft.
3. Add the cheese and allow the cheese to mix in well, about one minute on speed one.
4. Remove the paddle attachment.
5. Lightly cover with a greased piece of plastic wrap, and cover the dough. Allow the dough to rise for one hour.
6. Once risen, transfer the dough to a lightly floured surface.
7. Scale the dough into two pieces, each piece should weigh 1 lb 10 oz.
8. On a lightly floured surface flatten each piece of dough, by pressing down on it with floured hands.
9. Using your fingers, tightly roll the dough towards you, as if you we’re making a jelly roll.
10. Place the rolled dough on a large enough piece of parchment paper, making sure the seam is facing down.
11. Lightly press down on the rolled dough, to slightly flatten it out.
12. Using a serrated knife, score the loaf three times.
13. Repeat with the second dough.
14. Cover the formed loaves with a lightly greased piece of plastic wrap.
15. Allow the loaves to rise for twenty minutes.
16. Remove the plastic wrap off of the loaves, and generously mist the loaves with water using a spray bottle.
17. Bake the loaves in a 400 F oven for twenty to thirty minutes.
18. Transfer the baked loaves to a cooling rack and allow them to cool for one hour.

Graham Crackers

18 Sep

20120916-103002.jpg

The irresistible crunch of the honey infused, lightly sweetened graham cracker is irresistible. They are a key ingredient in Key Lime Pie, Cheesecakes and many other crumb type crusts. I simply love to dip them in a cold glass of apple juice to slightly soften their texture as the natural sweetness and flavor of apples infuses the cracker.
Whilst graham crackers are traditionally made with graham flour, which is a coarser more whole version of whole wheat flour, these were made differently. I used a combination of all-purpose flour and whole wheat flour. The resulting texture is much more refined, without sacrificing the flavor.

20120916-102855.jpg
Much like a pie crust, crackers use the same mixing method. The flour is “rubbed” with semi-frozen even sized chunks of fat. Once the fat has broken down to the size of peas, the wet ingredients are mixed in just enough to bring everything together. The resulting crumb is tender, or in this case, short and crispy.

20120916-102906.jpg

20120916-102916.jpg
Once the dough has been mixed, it is wrapped in plastic wrap, flattened to a disk, and refrigerated overnight. I personally like to refrigerate it for 24 hours.
I like to divide the refrigerated dough in half; I leave one half in the refrigerator, and I roll the second half. I like to create ridges I the one to be rolled out.

20120916-102931.jpg
By creating these edges, it facilitates the rolling out of the dough, whilst reducing the possibility of it cracking up on me. The outer edges are trimmed off with a pizza cutter, and you end up with a rectangle.

20120916-102944.jpg
I then cut the crackers to shape (3″X2.5″ inch this case), using a cookie cutter, I place them on a parchment lined sheet pan, cover then loosely in plastic wrap and refrigerate then for 20 minutes while the oven preheats. I repeat the same process with the second half of the dough, but before placing the sheet pan in the refrigerator, I sprinkle the top with cinnamon sugar.

20120916-102955.jpg

20120916-103008.jpg
These scrumptious crackers bake to a darker color, and the flavor is richer yet not overpowering. I guarantee you that you’ll never go back the the dull, cardboard like store bought stuff. I’ve posted the recipe by weight in Metric, for a converted version, feel free to email me.

20120916-103016.jpg

Graham Crackers

Ingredients

275 grams unbleached all-purpose flour
100 grams whole wheat flour
176 grams dark brown sugar
6 grams baking soda
3/4 teaspoon kosher salt
100 grams unsalted butter, cut into 1-inch cubes and frozen
114 grams honey
77 grams whole milk
2 tablespoons pure vanilla extract

Cinnamon Sugar Topping

Ingredients

1 teaspoon cinnamon
3 tablespoons sugar

Directions

1. In your mixing bowl, place the all-purpose flour, whole wheat flour, brown sugar, baking soda, salt and frozen butter.

2.Fix the stand mixer with the paddle attachment, and mix on speed 1 until the mixture resembles coarse flour, or the butter chunks are the size of peas.

3. If you do not have a stand mixer, use a pastry cutter.

4. Meanwhile, combine the honey, milk, and vanilla extract well.

5. Add the entire wet mixture to the dry mixture.

6. Continue to mix on speed 1, just until the dough comes together. The dough will be sticky. Do Not Over Mix.

7. Wrap the dough in plastic wrap, and flatten to a disk. Refrigerate overnight or for best results 24 hours.

8. Divide the dough in half. Place one half in the refrigerator wrapped in plastic wrap. Place the second half on a lightly floured surface.

9. Gently round the dough, and flatten to a disk. Place the rolling pin 1/4 of the way down from the top edge, and gently rock it back and forth to create a ridge. Repeat for the bottom edge too.

10. Using the ridge as your guide, start rolling out the dough on both ends until the top is level. Continue to roll until it is 1/4 inch thick, making sure to rotate the dough a 1/4 turn after each roll.

11. Using a pizza cuter, cut the outer edges to form a rectangle.

12. Use a square or rectangular cookie cutter to cut out the crackers.

13. Place the cut out crackers on a paper lined sheet pan, sprinkle with the cinnamon sugar mixture if desired, and loosely lay a sheet of plastic wrap on top.

14. Refrigerate the crackers 20 minutes before baking.

16. Bake at 350 F for 10 to 11 minutes or until lightly browned. Do Not Over-bake. The crackers will be slightly soft when they are fresh out of the oven, but will crisp as they cool.

King Cake

24 Jan

Finished King Cake!

Laissez les bons temps rouler! Ah, the classic saying that brings those memories of the southern celebration of Mardi Gras! From the gumbo, to the floats, the Nutria, and the King Cake – one can not say no to this beautiful celebration that not only celebrates a southern tradition but also a Christian Epiphany.

This post is all about the King Cake, the “Rosca de Reyes” as it is known in Spanish (a.k.a. Three Kings Cake – more on that later). But first, lets all see how the good times got a’rolin with the rich history of this iconic cake.

King Cake Dough

King Cake started out as a way to celebrate the coming of the Three Kings to honor the birth of Christ on Epiphany. It is not known where King Cake originated from, but due to its Christian roots, it could have originated in France, Spain, or Greece. In France there are two main types of King Cakes, the northern French and Québécoise version is made of layers of puff pastry with a frangipane (almond paste) center. In the south of France they make a more “old school” type of King Cake which is made of Brioche with candied fruits (a fluffy, and buttery fruit cake). The Spanish version is like the southern French version, but with candied fruits on top instead that symbolize the jewels of a crown.

The proofed dough

All of these cakes are said to symbolize a path to the Epiphany of Baby Jesus Christ, a guide that would lead the Three Kings to witness the Miracle.

The cnnamon-sugar filling

As any King Cake enthusiast, both from our time and way back then, know that the trinket found in the King Cake is the moment we all look forward to. The Romans used to place beans in baked goods and said that the “king of feast” would stumble upon it. The bean would later, because of Catholic influences, symbolize Baby Jesus Christ. In the later years the bean was replaced by first a porcelain miniature doll of Baby Jesus Christ to the modern plastic figurine. In modern times, it still symbolizes the aforementioned, but it also means that the recipient is responsible for bringing the next King Cake for he or she is the “King of the day”. In France, they used to cut the cake according to the number of guests, plus one. This extra slice would be given to the first poor person to arrive at the house. The slice was known as “the share of God”, the “share of the Virgin Mary” or the “share of the poor”.

Shaped Dough

Scored and ready to proof again

The version that I am making and that is associated to the celebration of Mardi Gras is commonly called the “Acadian” or Cajun French version. It can be said that its influences were both from the French and Spanish version. The bread is most definitely the southern version of France, because it is very similar to a Brioche. The cinnamon and nutmeg can be traced to the Romans who had a great influence on the Spaniards. The dried fruits in the Spanish version, as mentioned above, symbolize the jewels of a King’s crown; Baby Christ recieved “jewels” from the Three Kings to help the poor family. In the Acadian version the cake has a white icing on top that is sprinkled with coloured sugars, the “jewels”. The sugars are as follows and symbolize:

Purple, Green and Gold: The Colors of the King Cake

Purple – Prosperity/Justice

Green – Faith

Gold – Power/Wealth (meaning wealth in love, family, friendship, etc. Not monetary wealth. It is the non-materialistic things in life that make one truly wealthy)

Fully proofed dough

As you can tell from what King Cake truly is, one must keep in mind that it is not about partying, it is not about the beads, and is most definitely not about the unspeakable things people suggest other people to do for said beads. The King Cake is much more than just a family tradition. The King Cake is about the celebration of Life, Love and the Passion of the Christ – for it symbolizes His Epiphany to the Human race.

Baked, cooling down ready to ice and sugar

Baked, cooling down ready to ice and sugar

The following recipe has taken me lots of trial and error, if I were to name it, I would name it King Cake No. 6. After six tries I finally got it right, what set me in the correct path is when my wife and I went to New Orléans for Mardi Gras. There I had an authentic King Cake, and it really opened my eyes as to what a King Cake is supposed to taste like and its correct texture. I hope you and your family or friends enjoy this King Cake, it really is a lot of fun to prepare and specially eat.

With certain recipes, specially yeast leavened such as this King Cake, I like to weigh my ingredients using a digital scale. You can buy one at any major store such as Target, Wal-Mart or Kmart for around $30, or you can just buy it online. I have included the volume measurements in parenthesis, but these are approximate and while they are trustworthy, it is always best to weigh!

The glaze

So next time you bite into a slice of this delicious pastry, be it the Acadian, French or Spanish version, allow yourself to celebrate it for much more than a lustful indulgence of fat and sugar – celebrate the rich spiritual history this cake carries. Bon Appetit!

Finished King Cake!

King Cake
Yields: 1 – 6 3/4 Lbs King cake

Ingredients:

1 lb 4 oz All-Purpose Flour (3 3/4 cups)
1 lb 1oz Bread Flour (3 1/4 cups)
2 tablespoons Instant Yeast or Rapid Rise Yeast
2 teaspoons Nutmeg
6 oz Butter (1 1/2 sticks)
2 oz Water, lukewarm (1/4 cup)
6 oz Milk, lukewarm (3/4 cup)
8 oz Sugar (1 cup)
3 Eggs, Whole Large
4 Egg Yolks, Large
2 teaspoons Sea Salt
1 Whole Egg beaten in 1/4 cup Whole Milk

Cinnamon-Sugar filling:

1 tablespoons Ground Cinnamon
4 oz Sugar (1/2 cup)

Glaze:

5 cups Confectioners Sugar
5 tablespoons Milk
1 tablespoon Pure Vanilla Extract
2 teaspoons Lemon Juice

Sugars:

7.5 oz container of Purple Sparkling Sugar
7.5 oz container of Green Sparkling Sugar
7.5 oz container of Gold or Dark Yellow Sparking Sugar

Directions:

  1. In a stand mixer with a paddle attachment, combine the all-purpose flour, bread flour, yeast and nutmeg; place the bowl and paddle in the freezer for 15 minutes.
  2. Cut the butter into equal size pieces and place in the freezer for 15 minutes.
  3. Take the bowl and butter out of the freezer, place the butter on top of the flour mixture, attach the paddle to the mixer and mix on the lowest speed.
  4. Continue to mix until the butter is the size of peas.
  5. Meanwhile, in a large bowl, mix the water, milk, eggs, egg yolks, sugar and salt; combine until the sugar is fully dissolved.
  6. Once the butter has reached its pea like size, pour the liquid mixture into the flour. Mix on speed 3 until it forms a homogenous dough.
  7. Remove the paddle attachment, making sure to clean it well of any dough that is stuck on it, and set it aside. Attach the dough hook attachment.
  8. Mix the dough for 7 minutes on speed 3. The dough must be elastic and slightly moist when done mixing.
  9. Place the dough in a warm place and allow it to rise for 45 minutes to 1 hour, the dough must double in size.
  10. Once the dough has risen, remove from bowl and fold it over onto itself three times, while simultaneously pressing down on it to remove any excess air.
  11. Using a rolling pin, roll the dough out into a 20 inches by 15 inches rectangle.
  12. Combine the Cinnamon and Sugar, and then sprinkle this on top of the stretched out dough.
  13. Roll the dough by rolling it towards you, like a jelly roll, making sure to roll it tightly.
  14. Once fully rolled, form an oval by bringing in both ends. Mend the ends together by pressing and pinching on the seal.
  15. Score the top of the King Cake, and place it in a warm spot for 45 minutes to allow it to rise again.
  16. Meanwhile, pre-heat oven to 375°F.
  17. Brush the top and sides of the King Cake with the combined beaten egg and milk. Bake the risen King Cake for 25 to 30 minutes, the top must be golden brown.
  18. Allow the King Cake to cool for at least 1 1/2 hours before applying the glaze and sugars.
  19. Once the cake has cooled down, it is time to make the glaze.
  20. Using a whisk, combine the powdered sugar, milk, vanilla extract and lemon juice.
  21. The glaze should be thick like pancake batter. If it is too thin, add more powdered sugar in 2 tablespoon increments. If the glaze is too thick, add milk in 1 tablespoon increments.
  22. Pour glaze on top of the King Cake, using a rubber spatula make sure that the sides are also covered as well.
  23. Once the King Cake is covered, immediately sprinkle the sparkling sugar on top of the glaze in even rows, alternating between all three colors.

Kruidnoten (Kruidnootjes)

12 Dec

Surely we have all heard of Speculaas, the Belgian spice cookies that we associate with the Christmas season. We seldom hear of their cousin, the Kruidnoten (crude-not-en). I was first introduced to the Kruidnoten by my wife. When she was in high school, she lived in Holland for four years because of her father’s job. There, she first had these little cookies.

The other day we were shopping at Central Market for some ingredients I needed to make a Bûche De Noël. There she pointed out these little round cookies that took her back to Holland, “I had the ones that were covered on cocoa powder!” she shrieked. However, she could not remember their name. With much re-search on her part, she informed me of their name.

Kruidnoten are oftentimes confused with Pepernoot, even by the Dutch themselves. Pepernoot is a softer cookie made with different spices. As mentioned above, Kruidnoten is made with the same spices as Speculaas. The Dutch have long eaten these spice cookies. They throw these cookies by the handful and have children find them, this is a symbol of fertility. They are mainly eaten during the Sinterklaas holiday, that takes place on December 5. The holiday is to honor Saint Nicholas, the patron saint of Amsterdam, children and sailors. Saint Nicholas is basis for which we use to distinguish Santa Claus today.

You can either buy or make your own Speculaas spice blend. I have included a recipe at the end of this post.

Typically, I like to use a machine to combine the ingredients for these cookies. However, when I am about to add the flour, I prefer to mix it just halfway with the machine, and then finish combining the flour by hand with a rubber spatula. This ensures that I am not over mixing.

A scale is highly recommended to accurately make each Kuridnoten even in size. I like to use the grams option for these, since they are so tiny. I do not recommend you to try doing it without a scale. This will help prevent you from having some undercooked and some overcooked. Another approach you can take, is to roll half the dough into a 12 inch cylinder, that has a thickness of 1/4 inch.

While they are irresistibly delicious by themselves, I also like to cover these in a mixture of cocoa powder and powdered sugar. Make sure you use a high quality cocoa powder, such as Callebeaut.

At times I like to cover them in chocolate; I find that a semi-sweet works best. In order to cover them in chocolate, you will have to temper it. I will later explain how to do this in a separate post. For now, let’s stick to the cocoa powder. Keep in mind that this recipe yields 137 Kruidnoten, I suggest giving them to friends as little gifts. You can even portion, shape and then freeze them raw. Make sure to freeze them on a sheet pan, and then transfer them to a freezer bag. They should keep for 3 months in the freezer. Simply take them out and place them on a sheet pan, cover them loosely in plastic wrap, and allow them to defrost in the refrigerator overnight before baking.

Kruidnoten
Yields: 137 cookies

1 stick butter (4 oz)
2/3 cup granulated sugar
4 tablespoons molasses
1 1/2 tsp speculaas spice blend
2 tsp salt
2 cups flour
1 1/2 teaspoon baking powder

Directions:

  1. Pre-heat the oven to 320°F (160° C).
  2. Cream the butter well, add the sugar and molasses; cream until light and fluffy.
  3. Add the salt and speculaas spice blend, combine well. Scraping the bowl once well combined
  4. In a separate bowl, combine the flour and baking powder; add to the above in one step.
  5. Make sure you stop mixing once the flour in throughly combined, do not overmix!
  6. Cover the dough tightly in plastic wrap, and refrigerate for at least 2 hours,but preferably overnight.
  7. Using a scale, portion out into 5 gram pieces (1/8 oz). If you do not have a scale, roll half the dough into a 12 inch cylinder, that has a diameter of 1/4 inch and cut out cookies that are 1/4 inch thick.
  8. Gently and lightly press them down so that they are not round on top.
  9. Bake for 8 to 10 minutes.
  10. Allow for them to cool completely, about 30 minutes to 45 minutes.
  11. Toss and completely cover them in the cocoa powder blend.


Cocoa Coating

8 tablespoons cocoa powder
1 tablespoon powdered sugar

Directions:

  1. Sift the cocoa powder and powdered sugar together; combine well.


Speculaas Spice

2 tablespoons + 1/2 teaspoon ground Cinnamon
1 1/2 teaspoon ground Cloves
1 teaspoon ground Ginger
1/2 teaspoon ground Cardamom
1/4 teaspoon ground White pepper

Directions:

  1. Combine all well. Store in an air-tight container.

Crème Fraîche

6 Dec

Thank heavens for the wonderful cows of Normandy. These cows live the life to the fullest. They are pasture fed, and pampered. It is no wonder they produce great dairy for delectably delicious butter, Camembert and other great cheese, and of course Crème Fraîche or “Fresh Cream”. Crème Fraîche is the French equivalent of sour cream; but much richer, flavourful and delicious. Unlike sour cream, Crème Fraîche tends to be higher in fat, making it an ideal cream to add to hot soups without the fear of it curdling. It is thickened with lactic acid bacteria or Streptococcus lactis, which is found in cultured buttermilk.

Crème Fraîche is readily found in the commercial market, however it is ridiculously expensive. It can easily be made at home, and as with many other ingredient recipes featured on my blog, gives you complete control of how tart you would like it to be. As mentioned above, it only contains two ingredients: heavy cream and buttermilk. When buying the heavy cream, try to find one that is just pasteurized versus ultra-pasteurized, because the latter takes longer to thicken.

The cream is slowly heated to 105°F (40.5°C), then a small amount of buttermilk is added. The cream is then allowed to stand covered at room temperature, for 24 to 36 hours; all depending on how thick and tart you would like it to be.

You can use Crème Fraîche in various applications. Typically, because of the higher fat content than sour cream, it is used as a finishing sauce because it does not curdle. Try to sweeten it and add it to fruit. Replace the sour cream in cheese cake with Crème Fraîche for a richer, smoother cheese cake. The possibilities are endless, it is up to your imagination!

Crème Fraîche

2 cups heavy cream
2 tablespoons buttermilk

Directions:

  1. Make sure the container that you will use to make the Crème Fraîche is throughly sanitized. To do this, simply place the container in a pot and cover it with water. Allow the water to come to a full boil, and boil for 10 minutes.
  2. Once the container is sanitized and air-dried, begin to heat the heavy cream to 105°F (40.5°C) at medium heat.
  3. Once the cream has reached the target temperature, transfer to the sanitized container and whisk in the buttermilk, and mix well.
  4. Loosely cover the container with plastic wrap, and allow for it to stand in a cool and dark place for 24 to 36 hours; depending on how thick and tart you would wish for it to be. Keep in mind that the Crème Fraîche will thicken and sour more as it ages in the refrigerator.
  5. The finished Crème Fraîche may be stored in the refrigerator up to 10 days.